Pumpkin Pie ... simple

OK, so just like you probably are, I am WAY too busy. I have no idea how every second gets filled up in my days, but it always seems to be the case ... Team Godfrey GOES! and goes and goes ...

Thanksgiving is most likely leaving you little time or desire to read a long blog, and that is GREAT because I have no time to really write one. However, my children have been reminding me that a "promise is a promise", and well, I promised a friend of mine that I would post my most recent recipe for pumpkin pie that I made on Halloween Night, so with that hanging over my head, here it GOES ..

pumpkinpies.jpg

Pumpkin Pie (gluten & dairy free)

What You Need

  • 2 frozen GFCF pie shells (I used Kinnikinnick)
  • 2 cups of organic pumpkin (can)
  • 2 eggs
  • 1 can of COCONUT CREAM + a carton of CULINARY coconut milk (So delicious brand) enough to equal 1 1/4 cups
  • 3/4 cups of brown sugar
  • 1 teaspoon of ground cinnamon
  • 1/2 teaspoon of ground ginger
  • 1/8 - 1/4  teaspoon of ground cloves
  • 1/8 - 1/4 teaspoon of nutmeg
  • 1/2 teaspoon sea salt
  • 2 teaspoons vanilla

What To Do

  1. Preheat oven to 400 degrees.
  2. Pour all the ingredients (minus the pie shells) into a large mixing bowl. Mix them together well with a mixer or whisk.
  3. Pour the orange, liquidy-gooey pumpkin mixture into the prepared shells. Allow the batter to go super close to the top of the pie crust rim. Try not to overflow.
  4. Bake the pies for 15 minutes at 400'. Reduce the heat to 325 degrees. Bake for 45-50 minutes at this new temperature. If the crust begins to get too brown, loosely cover it with foil. (I did not need to do this with this particular crust.) Remove the pies from the oven once the center doesn't jiggle when lightly shaken.


Tested Tip

If you are needing to stay away from more allergens than just gluten and dairy, please make my Crustless Pumpkin Pie from The Air Diet cookbook (www.theairdiet.com/store)! It is also quite delicious and will satisfy your pumpkin craving this holiday!

Fulfilling a Promise - Key Lime Pie

Inspired by the sun and fun of the approaching Labor Day weekend, I had high hopes of creating a scrumptious key lime pie to spark up the holiday eats. I bought all the ingredients I thought I would need, and even scribbled down a potential recipe. Labor day came with lots of beach fun and family time, but I never did get around to making the pie I had promised to my key lime loving husband!

 
20160911_153401.jpg
 

So yesterday, I made it my post church project to create a gluten and dairy free key lime pie. I have to admit, I was actually really excited about this! As many of you know, I am not so into baking; in fact, it completely stresses me out. However, life circumstances have dictated that I learn to do it, and well, perhaps I will begin to like it more and more in time. But since key lime pie holds a special place in my heart, I was eager and happy to jump right into this sweet, baking adventure to make a delicious tart pie!

I honestly was hoping just to search online and find a recipe that would work, as a week had gone by and I lost my recipe I wrote down, go figure .... but I couldn't find one that seemed right for my taste buds and pantry. So, the educated guessing up a creative recipe began; and it turned out to be a success!

 
20160911_193107.jpg
 

I started off by making the crust. There were many healthier versions of crust that I could have made that would have been more Paleo in nature, but the truth is I just wanted a damn good pie; not necessarily a "healthy" pie. I mean come on....IT'S PIE! Got to be sweet. Got to be delicate! Got to be rich. Got to be flavorful. Got to be memorable.

So graham cracker crust is the direction I took. Of course, gluten free graham crackers! I used a box of Kinnikinnick Graham Crackers to create a perfectly moist, adhering crust. I placed the crackers into the Vitamix and chopped them until they were a fine mix of crumbs. I was aiming to have 2 cups of crumbs, but came up a little short as my oldest had stolen two of the crackers while I was prepping! I added a 1/4 cup of shredded coconut, 1 Tablespoon of organic sugar, as well as a heaping 1/4 cup of Hazelnut Meal to the graham crumbs, and blended them together in a large mixing bowl. Next, I added 6 tablespoons of softened (mostly melted) Earth Balance Dairy Free & Soy Free buttery spread. Once stirred together, I pressed the gooey graham cracker mixture evenly into the bottom and sides of a glass pie plate.

20160911_141544.jpg
20160911_142242.jpg


So I must confess, I could not at this point decide if I should bake this pie shell or wait until I filled it. In my indecisiveness, I went half in and baked it for only 6-7 minutes at 375'.

Now the most important part ... the filling. Eggs make me nervous. I don't like them. I mean, I like what they do, I just don't like how they taste. So, I wasn't sure how many yolks I wanted to throw into this baby. I set myself on 3. Two yolks and one whole egg. Not sure if that is standard, but seriously,  there really is nothing standard about a gluten and dairy free key lime pie! I am setting the standard here!

So 2 yolks and 1 egg went into another mixing bowl, along with a tad bit shy of a 1/2 cup of key lime juice. (You can squeeze those little limes yourself or buy it already prepared. It all depends on what allergens you are trying to avoid as many products have some sort of preservative/additive in them.) Although I did say I didn't want a "healthy" pie, it's a sliding scale; so I stirred in 1/3 a cup of honey .... and 2 Tablespoons of sugar.

Next came the game changer: COCONUT CREAM. Typically a key lime pie has sweetened condensed milk, but obviously this is not a dairy free item. The easiest replacement is a can of coconut cream. I chose to use the can of coconut cream, you can however, use a regular can of coconut milk and separate the cream from the liquid. If you enjoy extra steps ...have at it! I on the other hand rush to the easy when it is available, since so often all the options in my life just seem to be in one category of "HARD".

The final two ingredients to be mixed into the filling are tapioca flour (starch) and grated lime zest. The tapioca is necessary to help give the right texture to the pie, so don't skip that step! Two tablespoons need to be mixed into the liquidy-yolk-cream. I just threw the tapioca flour into the liquidy mix, and it made it challenging to mix all the clumps out when I was blending. So, I think it would be worth trying to sprinkle it around evenly while blending.

The lime zest ... Ok so once baked, it looked a little odd. But hey, I am creating something novel right? So,  maybe it looked perfectly pretty as designed. Your choice on the zest. If you don't throw it into the mix, put it on top of the pie after baking as décor with a zip of bright tartness.


The filling was more liquid than I thought it would be even after mixing it all together for quite some time. However, I went with it and poured it over the prepared graham cracker pie shell and baked it at 350' for 15 minutes, then covered it loosely with foil, and continued to bake it for 10 minutes. You will know it is ready when the center is not jiggly!

As I anxiously waited for the pie to cool, I ran out the door to pick up some So Delicious dairy free coco whip to add a nice finishing touch to this deliciously smelling hot pie! Whoo.... I was excited about this one. I was considering calling the pie "dinner" instead of our planned cookout, just so I could try it sooner!

I returned home from the store with two different whipped toppings ... So Delicious CoCo Whip (like coolwhip) and a canister of Rice Whip (canister of whipped cream). The Rice Whip definitely won on appearance and fun-factor, as for every one shot of rice whip that hit the pie, a few went into our mouths! (The kids had a blast with that!)  The So Delicious CoCo Cream won the taste test though. I will need to figure out how to make it look pretty next time around.

The first slice cut and lifted out of the pie plate perfectly! AWESOME!!!! My heart was so happy and I had not even tasted it yet!! Logan received the first slice (I stole a bite). The texture and taste were great: soft, creamy, sweet, tart! And the CRUST! The crust receives the shiny medal on this one! Oh my it was excellent. My only sigh was although it was tart, it wasn't snapping at my taste buds with a tart zing. I am not sure if that means put in more lime or take out some sugar. However, my immediate solution was to squeeze a lime on top of the pie. And that was it for me. Keylime heaven!

 
20160911_153401.jpg
 

The pie was a hit. I didn't expect my boys to be as excited about it as they were; which is fantastic, but there is no pie left! My oldest son ate 3 pieces (Yes, I let him eat 3 pieces of pie!!) and the first thing he said to me this morning when he woke up was, "Mommy, I really loved that key lime pie! It was soooooo good.". There you have it.

So Good!

20160911_193107.jpg


Key Lime Pie

Crust:

2 cups gluten free graham cracker crumbs

1/4 cup shredded coconut

1/4 cup hazelnut meal (heaping 1/4)

1 Tablespoon organic sugar

6 Tablespoons Earth Balance Dairy Free Soy Free Buttery Spread

Filling:

2 egg yolks

1 egg

almost 1/2 cup key lime juice

1/3 cup honey

2 Tablespoons organic sugar

2 Tablespoons tapioca flour (starch)

1 can of coconut cream, 5.4 fl oz.

1 Tablespoon lime zest

juice of 1 lime

Topping:

So Delicious Coco Whip

lime slice (thin)


What To Do

  1. Preheat the oven to 375'.
  2. Place an entire box of gluten free graham crackers into a Vitamix or food processor. Pulse or mix until the crackers become fine crumbs. Pour the crumbs into a mixing bowl. Stir in the coconut, hazelnut meal, and sugar, and mix until well blended.
  3. Add 6 Tablespoons of softened Earth Balance Dairy Free Soy Free Buttery Spread. Mix together until the graham cracker crumbs are totally moist.
  4. Transfer the buttery graham cracker crumb mixture to a glass pie plate. Press the gooey mixture into the bottom of the pie plate evenly, and about two thirds the way up the side.
  5. Place the pie crust into the preheated oven and bake for 6-7 minutes. Remove it from the oven, and allow it to cool and settle. Reduce the oven temperature to 350'.
  6. Crack 2 eggs and only put the egg yolks into a mixing bowl. Add 1 more entire egg (yolk & white). Beat the eggs together until uniform. Pour in (just a little less than) a 1/2 cup of key lime juice. Add the honey and sugar. Mix for a minute. Pour in the coconut cream and carefully add the tapioca flour a little at a time while you continue to mix the filling. If you desire (and I think you should), toss in the lime zest. Continue to mix until smooth.
  7. Pour the filling into the prepared pie shell. Bake on 350' for 15 minutes. Cover loosely with foil, and continue to bake for another 10-15 minutes.
  8. Remove the pie from the oven once the middle of the key lime pie is no longer jiggly.
  9. Set the pie out on a cooling rack. Once cooled to room temperature, place the pie (covered with plastic wrap) in the refrigerator until chilled.
  10. Before eating, squeeze a fresh lime over the entire pie. Decorate the pie with a dairy free version of whipped cream or cool whip. (I think the So Delicious CoCo Whip tastes best, but rice whipped cream allows for prettier presentation.)
  11. Add a sliver of a fresh lime and dive in!


The Taste of Fall ...

After coming home from an adventurous family camping trip in North Carolina, my eyes are starved for fall beauty. It is quite a visual let down to go from breathtaking views of mountains full of red, yellow, and orange trees to my current state of green, or dying foliage surrounding me in Florida! (Why do I live here? ... oh... I like the sun and warmth... keep repeating :-) )

So if I can't see fall right now, I guess the next best option is to taste fall! So time to bring on the delicious pumpkin!


While passengering (as I did not do my share of driving) in the car for hours on our trip, I had the chance to be inspired by many tasty looking pumpkin treats on Pinterest. So, here is my successful attempt to satisfy my fall craving with Pumpkin Muffins!


Now that Logan has experienced much healing in his gut over the years due to clean, allergy-free eating in combination with other healthy measures like HBOT, probiotics, antivirals, antifungals, and supplements to combat inflammation, I am now able to bake with eggs and rice flour rather than having to substitute these ingredients. Because of this, I decided to try out Bob's Red Mill 1 to 1 Gluten Free Baking Flour for these bundles of pumpkin goodness, and I am glad I did! Not only did it simplify the recipe, but they tasted fantastic - light, fluffy, but rich.  I think they would turn out great using another flour combination (for example, sorghum + garbonzo/fava flour + tapioca starch + potato starch), and I will explore that later.

Ready? If you are like me, a busy mom with only a short break of time to really only do one of the following: shower, bake, cook, shop, or do laundry before you have to just wait til tomorrow ... you better move quick!!!  Preheat your oven to 375', grab two large mixing bowls, a mixer, a large spoon, a spatula, measuring cups, measuring spoons, muffin liners (I like to use If You Care Baking Cups) and all your ingredients.

What You Need:

  • 1 1/2 cups Bob's Red Mill 1 to 1 Gluten Free Baking Flour
  • 1/4 cup hazelnut flour (could probably use almond instead if needed)
  • 1/8 cup organic flax meal
  • 1 cup organic cane sugar
  • 1/4 cup organic dark brown sugar
  • 1/4 cup organic blonde coconut sugar
  • 1 teaspoon baking soda
  • 1/2 teaspoon sea salt
  • 2 teaspoons cinnamon
  • 1/4 teaspoon ground cloves
  • 1/4 teaspoon nutmeg
  • 2 eggs (chicken or duck) **
  • 1 fifteen ounce can pure organic pumpkin
  • 1/2  cup coconut oil (could use organic canola oil if needed)
  • 1 1/2 teaspoons vanilla extract

What To Do:

Measure out all the dry ingredients and place them in a large mixing bowl. (I was a lazy measurer and most of mine were more like "heaping" measurements ... FYI) Use a large wooden spoon to stir all the dry ingredients together until it resembles one flour.


In the second bowl use the mixer to blend together the eggs, pumpkin, coconut oil, and vanilla. **I chose to use eggs because I had that freedom, but I am sure this recipe would also be delicious egg free. I have not made this one egg free yet, but if I did, I would use 3 tablespoons of applesauce mixed with 1 teaspoon of baking powder with the addition of  1  1/2 teaspoons of egg replacer combined with 2 tablespoons of water. (see why eggs are just easier?????) Another egg free option would be just to use 1 tablespoon of egg replacer mixed with 1/4 cup of water.


Pour the wet ingredients into the dry. Use a spatula to scrape the bowl to ensure nothing needed is left behind! Use the mixer to blend the ingredients until smooth and beautifully orange.


Stuff the muffin baking pan with the baking liners and fill them to the top with the pumpkin muffin batter. Sprinkle the top with raw sugar (little bit bigger crystals than regular sugar) and bake for 22 - 24 minutes. You will know they are done when your house smells amazing and cozy, or you can just stick a toothpick in and see if it comes out clean.


It may not look like fall in Florida, but at least now with this Pumpkin Muffin,  a couple of my senses are satisfied with a taste of this fall season.

Hope you enjoy!

Post Baking Thoughts - After eating one of these muffins, although seriously perfect as is, I think they could be even more complete with some finely chopped walnuts, pecans, and/or dried cranberries. My entire family is allergic to walnuts, so if you try it and it is good, let me know! Happy eating!


Failed Brownie Mess to Amazing Brownie Dump Cake ... A Quick Save!

With our family friends coming over for dinner, I wanted to do something sweet to finish off our fun night. My thought, petite-bite-sized brownies!  Sounded basic with a little classy upgrade sure to please all ten of us!

Due to the many dinner preparations I was trying to cram into the morning, I chose to cheat a bit by using a gluten-free box brownie mix. This was not my usual "go-to" quick baking brand, as Native Sun was out of it (I usually use Bob's Red Mill) and let's just say I will not go this route again!

After 10 minutes of baking these sure to be cute bundles of chocolate bliss, it was apparent that something had gone terribly wrong. Yes, a big FAIL in the Godfrey kitchen. I contemplated throwing them out, but the ingredients in those now crispy, misshaped-square brick bundles are way too expensive to just toss in the garbage. I considered serving them as is with a loving apology, but I quickly remembered I did that with the corn bread I served them last time they joined us for dinner...

Then the flash of memory ... I remembered seeing that So Delicious Dairy Free had a new Coolwhip-like product that was gluten and dairy free! YES! This mess could be salvaged!

 
20150918_144445.jpg
 

In our previous before Allergies and Autism existence, I used to make a brownie-pudding dump cake for big family dinner parties.  I sadly got rid of my glass trifle about 8 years ago thinking I would never have use for it again. But the day has come when we are fitting in a little more with the food world around us. No longer are we on an island, alone. Products are finally catching up with our needs! How freeing!!! How awesome!!! (How expensive!!!!)

So, I squeezed in a trip to Target to buy a bowl that would work for the now amazing dessert I was planning to create!


So here's how I turned this failed bite-sized brownie mess into a yummy Gluten-free, dairy-free, soy-free almost all organic brownie dump cake:

Step 1:  Completely screw up baking a batch of gluten-free brownies! (Or better yet, successfully bake a batch of brownies according to the directions on the box rather than trying to kick it up a notch! - or use the Chocolate Cake recipe in The Air Diet cookbook www.theairdiet.com/store )


Step 2:  Break the baked brownies into small chunks. (Remove any too burnt to eat pieces!)

Step 3:  Place half of the brownies chunks into the bottom of a trifle or trifle-like bowl.

 
20150918_142109.jpg
 

Step 4:  Cover the brownie chunks with a layer of GFCFSF Almond chocolate pudding. (There is probably no doubt a less expensive way to do this, but due to my desperation and lack of time, I used the small individual sized almond puddings by ZEN.)

 
20150918_142500.jpg
 

Step 5:  Then the magical ingredient ... layer the pudding with So Delicious Dairy Free Cocowhipped topping. (Smile because it is at this point at which things go from failed mess to amazing!)

 
20150918_142757.jpg
 

Step 6:  Decorate and enhance the whipped topping with sliced strawberries or raspberries along with some Enjoy Life Allergy Free Chocolate Chips. (You could really layer any fruit or candy you want here to add a little something-something to the dessert.)

 
20150918_144123.jpg
 

Step 7:  Repeat steps 3 - 6. Cover with plastic wrap and refrigerate. Use a spoon to scoop out the "Brownie Dump Cake" into a shallow bowl. Now, enjoy the delight you just gave your guests with your scrumptious dessert!  (And of course grab a bowlful for yourself!)


And the Winner Is...

When I was young (can't believe I am saying THAT!), I was the student and athlete that had so many awards and trophies, they almost became more of an expectation rather than an unexpected, exciting achievement. At this stage in my life, that is no longer the case! No one is giving me a trophy for keeping the kids alive and the house in order, restocking clean clothes in the closets, trying to figure out autism,  juggling multiple fitness classes, or for assuring the pantry is full and food is on the table! So to receive the Florida Authors and Publishers Association President's Gold Medal Award for The Air Diet came as a HUGE ... UNEXPECTED ... EXHILERATING ... achievement. What an honor it was to be recognized amongst so many talented authors here in Florida for my published Labor of Love!

 
0808152207.jpg
 

Thanks to my terrific mother-in-law and father-in-law, I was lucky to have a night away in Orlando with my ever-so-supportive husband, Michael, to celebrate--ME! You moms know that doesn't happen all too often...am I right??? Anyways, what a fun night! The banquet was nicely done: a great balance of professional-fancy-fun! The food was tasty and the wine was free! BONUS!!


I have no idea how being an "Award Winning" author will impact my journey with The Air Diet, but I hope with the newly added "Shiny Gold Sticker", more people will look to The Air Diet for guidance on their healing journey through Autism Spectrum Disorder, Leaky Gut, IgG Food Sensitivities, Lyme Disease, Celiac Disease, Fibromyalgia, Chronic Inflammation, Fatigue, Weight Issues, and other Autoimmune Diseases that negatively impact the immune system and one's well-being. 

How do I end this self praising blog?????  

Hmmm....GO ME! YEAH! So Awesome! Can't believe it! How Cool! And of course, a Big Thank You to Emily Merrill http://www.emilymerrill.com for her beautiful photography; Kristie Feltner http://kristiejoyfeltner.com  for her creative graphics & book design, Beth Mansbridgefor her precise editing, and Jane Wood & Frances with Get Book Savvy http://getbooksavvy.com for their mentoring through this publishing process! So thankful to all you for your talents, your commitment, and expertise!

Good times ... new smiles ... So honored!

A high moment for Me and Jigsaw Living!!


Love that Grill

Today I am just loving that grill! So thank you my dear Michael for getting one that doesn't make me feel like I'm about to catch fire while lighting it!

It's no secret! Eating healthy takes planning and preparation ... but don't let that hold you back. Make it easier on your self to keep your desired commitment to eating clean, nutrient packed food each day by preparing in advance the weeks lunch/dinner. If grabbing a fresh salad with grilled chicken or fish is just as convenient as grabbing a bag of chips ... chances are you will hold fast to your goal of making healthier choices for you and your family.

Lunch meals are a struggle for me. My mid day meal seems to get lost in the shuffle of preparing food for my boys and managing all the tasks and events we have set for the day. Often times I find myself eating their left over scraps, grabbing a handful of nuts, or if I'm lucky I squeeze in a protein & green smoothie. What I have found during my times of cleansing is that I feel so much more energized and stable when I have a wholesome lunch. I am a happier, energetic, emotionally stable mom on those days, and well, that is just good for everybody!

So with that in mind, this week I chose to set myself up for success! I marinated and grilled five chicken breasts, and prepared a large salad to be enjoyed throughout the next few days. Seriously, we do this often in our household, and not only does it help me out, but my husband is then able to easily prepare a wonderful lunch to bring to work, and my kiddos have healthy options readily available for their meals as well.

So what to do...

Here's the thing: when I cook I do not like to measure ingredients. Seriously, it is so much more fun to cook when you are not controlled by a recipe! Be brave ... give it a try. The only down side is if your dish is completely awesome, you may never be able to recreate it! (sigh) That is my husband's biggest complaint. He will take a bite of something and express how delicious it is, and then look at me and say, "You have no idea what you did, do you!"    "Uhhh...Nope!".

Ok, so welcome to my do it fast and healthy, organic, GMO, allergy-free kitchen!!!

(I will put an approximate measurement, but seriously just pour and shake what ever your taste buds tell you to do. For example, do you like citrus? Put on more lemon juice or orange juice. Do you prefer a smokey heat? If so, add more chipotle pepper. Feeling the desire for depth and spice? Add more cumin. Want it a bit more basic? Focus on chili powder and paprika. And when it comes to salt, pepper, and garlic ... shake in about how much you would add if sprinkling it on a piece of chicken, and multiply it enough for each breast! Remember, if it is easy to do ... you are more likely to do it! So.. get shaking!)

Step 1:  Prepare the Grilled Tex/Mex Chicken

Rinse 4 or more organic chicken breasts. Use a stainless steal meat tenderizer to beat them down to an even thickness. Stab each breast with a knife multiple times to allow the marinade to penetrate. (Sounds brutal!) Place the breasts in a large container. Now add the following ingredients...remember, be brave...trust your taste buds, skip the measuring and own it: Oil 1/4 cup (avocado, olive, canola, or coconut), lemon juice 1/3 cup, orange juice 1/3 cup, coconut vinegar (or white wine vinegar) 1/4 cup, chili powder 1 1/2 tsps., paprika 1 tsp., cumin 1 1/2 tsps., chipotle pepper 1/2 tsp., garlic 1/2 tsp., dried cilantro 1 tsp., salt, and pepper. Put the lid on the container and SHAKE! Allow the chicken to marinate for a few hours in the refrigerator. (I think I waited only 45 minutes this time and it was fabulous!)

Step 2:  While the meat is marinating, Make a Large Salad

I use a large rectangular Rubbermaid container to make and store the week's salad. The base of your salad should be some nutritious mixed greens, focusing more heavily on spinach, kale, and arugula. As far as the other veggies, your call. For me, my salads tend to have some of the following: mixed greens, spinach, arugula, kale, red onion, tomato, carrots, beet sprouts or roasted beets, raisins or cranberries, fresh berries, pumpkin seeds, olives, cucumber, bell peppers, fennel, fresh cilantro or rosemary, and roasted asparagus.

Today's salad was a mix of these lovely ingredients: mixed salad greens, spinach, cucumber, carrots, tomatoes, olives, blueberries, red onion, and the oh so divine AVACADO. (I have a deep love for the avocado! So delicious! So nutritious! I have one just about every day. Give up cheese and grab this green beauty...you'll be happy you did!)


Step 3: Grill the Chicken

I am no grill master, but I am experimenting and learning. Typically my hubby does the grilling, but with this new grill I am trying things out and gaining some confidence in this culinary skill! So my instructions are pretty basic : Light the grill and keep it on high to do some preheating for about 5-8 minutes. Once preheated, turn the temperature down to low-medium and place the chicken breasts on the grill. I got a little distracted while breaking up a serious Lego war between my boys, so my chicken stayed on the grill for probably like 10 minutes or more before flipping, and is a little charred. You typically need only 8 minutes, flip the breasts and grill 7-8 minutes more, or until no longer pink. Every flame is different, so just keep an eye on it.

Transfer the grilled chicken to a bamboo cutting board. Slice what you will use and package the remaining breasts for future meals. (Typically I use 1/2 a breast for one serving.)


Step 4: Create your Lunch!

Fill a plate with your desired amount of salad. Add your chicken, and if you want to kick it up a notch... a sliced avocado. I typically slice the avocado, and top it with some lemon juice, salt, and garlic ... think un-mashed guacamole! Drizzle on some fresh salad dressing (olive oil, lemon juice, vinegar, salt, pepper, garlic, agave/honey). Enjoy!


Step 5: Create your Kiddos Lunch!

You are modeling a healthy lifestyle, so share your awesome food with your kids! Most certainly your children are not screaming for a salad, but you can use your salad fixins to create a nutritious lunch for them without adding much more work for yourself. 

Tested Tips:

  1. Cut the chicken breast into small pieces and stick in a tooth pick. My boys think everything is more enticing with a toothpick!
  2. While you are making the salad, cut strips of peppers, carrots, and cucumbers that can easily be picked up with little fingers.
  3. Use half of the avocado from your salad to make a quick, basic guacamole-like dip. Just mash the unused half and add a little bit of lemon juice, salt, and garlic. Let them dip their veggies into it. Dipping is fun and with every dip they are ingesting amazing healthy fats to fuel those growing bodies and minds.

I hope you enjoy your lunches this week as much as I will!

Wishing you health, happiness, and healing ... Laura G.


OMeGa Powerballs!

Today I made one of my all time favorite bundles of awesomeness: OMeGa Powerballs. I originally created this recipe in order to have a quick, easy-to-eat breakfast jam-packed with nutrients for my kiddos. However, they very instantly became a love of mine ... I have to watch myself, as when I eat these I seem to have no "off button"! (hence the OMG!)

So what makes these balls so powerful and awesome? Well for starters, it is loaded with tons of protein, fiber, healthy fats, and omegas from the nuts, quinoa, flax, and seeds smashed up in each little ball. To top it off, they are even blessed with Ancient Aztec warrior strength and stamina through the addition of tiny chia seeds.

I try my best to fuel my kids with foods that will balance their physical and mental health, and help them grow. As you "Autism Mommies" know, this is not always an easy task; our children can be quite self limiting in their food selections and very resistant to new foods! Having a little power packed ball that easily fits in their hands and can be devoured in a couple bites ... something to smile about! They don't know every cell in their body will be singing praises as they are flooded with essential, healing nutrients ... but you do!

Go ahead and tell them it is a "cookie ball" (Sure tastes like one!). I always seem to get the best results with my boys when I twist the name into something favorable or sell them on their desired outcome ...  "It will help you become a strong ninja." (Not far from the truth!)

Just another trick for your trade.

Enjoy!                                                                                               

 
powerballs and me.jpg
 

(I revised a recipe from www.gimmesomeoven.com so that it would adhere to my son's allergy profile and be organic and packed with the most nutrients!)

OMeGa Powerballs

What You Need

  • 1 cup quinoa flakes
  • 2/3 cups toasted organic coconut flakes
  • 1/2 cup organic almond butter/cashew butter
  • 1/3 cup organic flaxseed meal
  • 1/4 cup organic pumpkin seeds (roasted, salted, or raw)
  • 1/2 cup allergy-free enjoy life chocolate chips
  • 1/3 cup local honey
  • 1 Tablespoon maple syrup/organic agave (optional)
  • 4 teaspoons chia seeds
  • 1 teaspoon vanilla extract

What To Do

  1. Grab a big mixing bowl and a baking sheet. Preheat the oven to 350'.
  2. Scatter the organic coconut onto the baking sheet and bake in the oven for 5 minutes. Try to flip it a bit halfway. (Keep your eye on it as it can quickly become a black, stinky, burnt mess!)
  3. Start filling the mixing bowl with the ingredients. Use a spoon to mix all the ingredients together until evenly blended.
  4. Place bowl into the refrigerator for 10 minutes.
  5. Use a spoon to lift just enough of the mixture out to make the desired sized OMeGa Powerball. Roll the extracted mix into a ball until no more mixture remains, and store in an airtight container in the refrigerator.
  6. These balls are great for a quick breakfast, treat,  or a mid-day boost!


Share the Love!

Holidays, as awesome as they are, can be a stressor for those of us that have loved ones with food sensitivities/allergies; especially the holidays that really revolve around food and candy (hmmmmm....I think that is like ALL of them!) Even if you are not trying to avoid food irritants, all parents can relate to the effect that too much sugar and dyes can have on the kiddos. And if your family is like mine, couple all that with autism, ADHD... there is a reason you'll be toasting with that bottle of wine tonight!

So should you just avoid this LOVELY day altogether. NO way! You can still share in the sweet celebration, share your love, avoid food intolerances and GMOs, and maintain the sanity in your household.

This was my quick solution for this day of LOVE!

So here's your easy steps to these divine chocolate hearts...

I said this was quick, right? So, not totally from scratch but totally in line with our food allergy profile. No Gluten, no Casein, no GMOs, no dyes... you get the idea.

I started out with a bag of Bob Red Mill's gluten free brownie mix. The directions are straight forward, but I used Earth Balance dairy & soy free butter instead of margarine, and a DUCK EGG to replace the chicken egg. There is an egg free suggestion on the bag that you can use if all eggs are not an option. For the chocolate chips, I used a new favorite: Equal Exchange Chocolate Chips (they are sooooooooooooooo good ... too good!) I did not measure, just threw in about 1/3 of the bag. The other thing I did differently was use a fresh vanilla bean instead of the vanilla extract .. you've got to try it!  (If you are not sure how to extract the beans, check out the demonstration in The Air Diet cookbook.)

I mixed it all together as suggested and baked it according to the directions. (If you love chocolate, as we do, or just want that added antioxidant, mood enhancing blissfulness that cocao provides ... sprinkle the top of the brownies with a few more chocolate chips, YUM!)

After a few hours of cooling, the fun begins! Grab your kiddos and a couple heart shaped cookie cutters, and start sharing the joy of Valentine's day ... fun family time, love, and CHOCOLATE!

Had I not been trying to be super quick, I think outlining these chocolate heart brownies with some vanilla icing would have been a fabulous touch.

I hope you enjoy these as much a we did. (Notice I said...we did. They didn't stick around too long!)


Happy Valentine's Day!

2015-02-12 10.05.53.jpg
2015-02-14 13.16.00.jpg


Hold On to Yesterday!

Yesterday our son had one diagnosis, one label; today because of updated expanded tests, he has 5 with some subdivisions! Five categories to classify and describe my son. Amazing how a 23 page document can instantly leave one feeling so deflated. I feel deflated. This document I hold classifying, describing, and supporting multiple labels for my son. You autism moms…you know the deal. That moment after listening for hours attentively to every detail the doctor utters about your child…it all crashes in. The fact that you are actually holding a document of “scientific data” on your child, painful enough!!  But then what it says….what it means for now, for the future.

As I describe in the Our Story section of the Air Diet www.theairdiet.com/store …the rug has once again been pulled out from under me and I sit here alone in my ache and worries. How one sweet boy could rank so low compared to others his age is hard to soak in ...because he’s our boy.

As I sat in the car processing all this (actually just frozen really in my oozing weeping) I was reminded of “The Voice of Truth”, of course I then quickly YouTube the song and find myself in a state of crying more with strong tugs on my soul. But what is the truth…

The truth is autism is hard. The truth is that autism exposes all your child’s and your own insecurities, mental and physical deficits, fears, genetic weaknesses, emotional flaws, and doubts to the world. But the truth is it also reveals your strengths and pulls out of you, as a parent, qualities you may never have shown otherwise. It also demands that you live in the moment and treasure what is good, what is right, what is real, what is important. You have to find that silver lining!

Logan may not have measured up highly compared to the majority of the population on some standardized tests; however, our Logan, our autistic Logan is sweet to everyone; works hard and wants to do his best; he plays on a basketball team with typical teammates his own age; is learning to play the piano; does his own laundry; helps with household chores; loves babies and is gentle with them; helps me cook and bake; understands the importance of a healthy organic diet; enjoys shopping for and learning about fruits and vegetables; cares for his pet bunny; plays with and looks out for his younger brothers; and is the first to say to me “I love you” each morning. That’s the truth.

Perhaps these are not standard, measureable gains…but I am choosing to listen to “The Voice of Truth”.

So yesterday was better than today. In fact, I was all pumped ready to blog about my wonderful shopping experience with my kiddos, and now, deflated I just have to. I have to for me, to hold onto what is true and good. I have to for Logan. I have to for you, for hope. 

Breathe… go back…

Yesterday, Super Bowl Sunday!

I headed out with my crew of three after church to do our weekly shopping with the additional extras for our Super Bowl Super Feast! Now, any mom can relate…shopping with a long list and three energetic, hungry boys is not a task taken lightly. I was prepared. Like any good mom of an autistic child, I had my kiddos’ reward charts ready for that positive reinforcement ensuring a successful outing...in addition, I made sure the quiet threats whispered about losing their lunch out and much desired treat at Native Sun were clearly understood!  sorry ABA therapists, but got to balance things out!

As the glass doors of the health food store slide open, it feels like walking into a potential war zone. I brace myself, take a deep breath, pop a couple chewable L-theanine to prevent unavoidable stress overload, and enter.

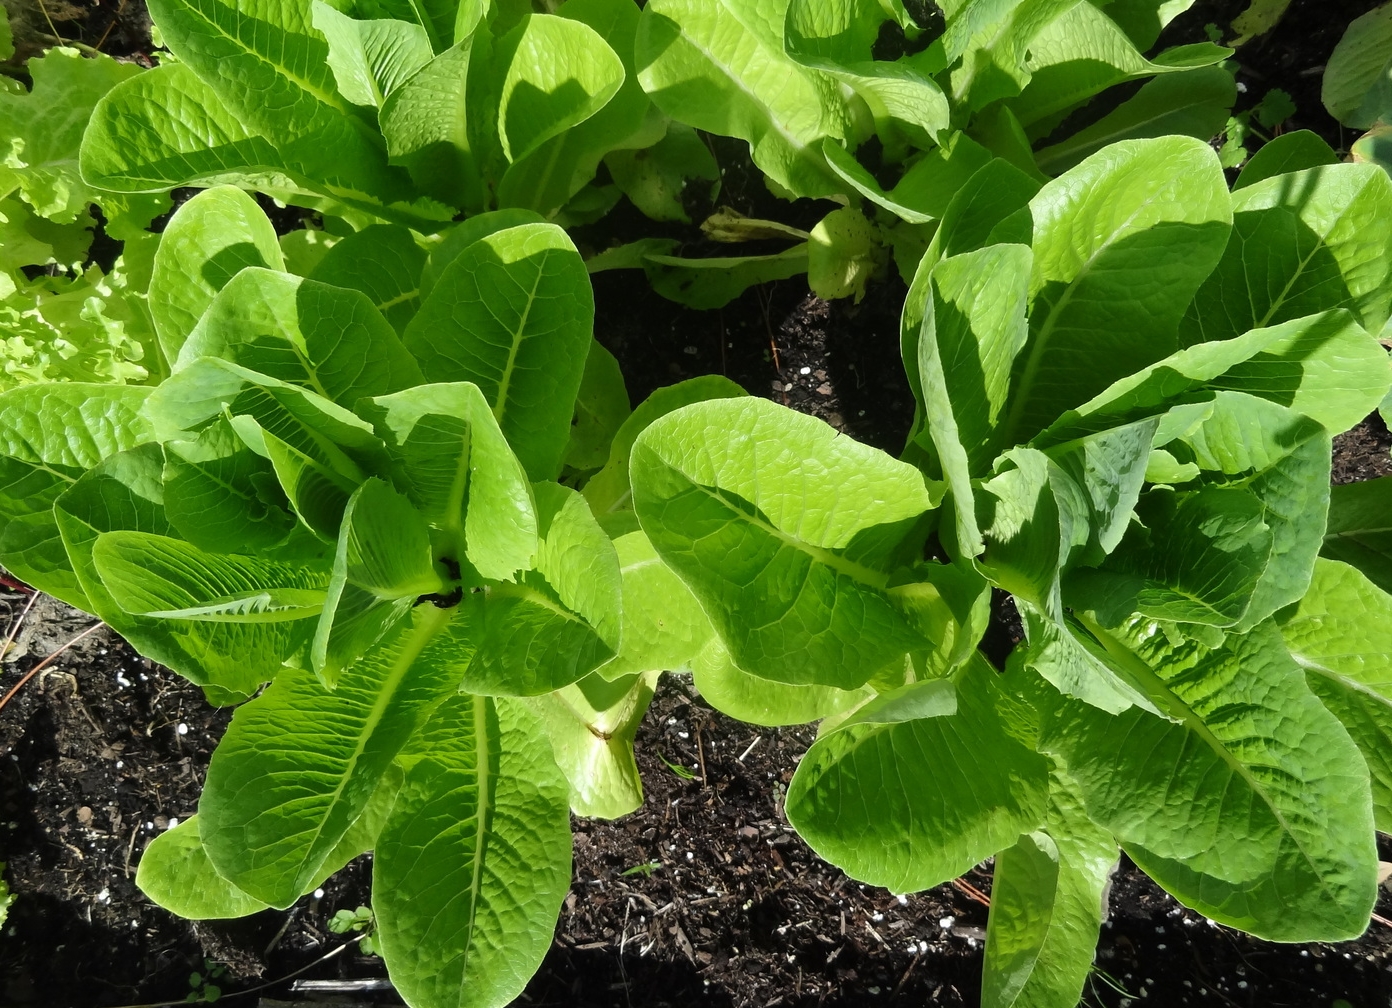
Logan quickly goes into his excited search for every possible organic fruit or vegetable he can find…we are in a completely organic food market…you get the picture! Feeling the sudden surge of adrenaline, I remind myself to stay cool and calmly redirect my Logan and rally in my wandering other two sons. The L-theanine must have kicked in because I had that moment of pure sweet pleasure in which I felt so proud of my son as he began to describe all the organic vegetables and explain to me how bad and gross GMOs were for people. The health educator in me was beaming with pride from her valued student’s intelligence and passion.

Certainly it was not like we were floating peacefully and effortlessly through the store….there was redirecting, lifting up arguing kids from under the cart, running over my child with the cart, and periodically removing foreign foods from the cart, but four times…,..FOUR times I was complemented on how well behaved my children were in the store, and praised by how aware they were about healthy food choices.

Towards the end of our shopping adventure, a woman with a big, friendly smile approached me (of course as I was reaching in the freezer for an organic, gluten free pizza … busted!). She said to the boys, ”You are so lucky to have such a smart mommy. She is filling you with such wonderful, nutritious food. This is why you are so good. This is why you are so smart. Remember this, your mommy is doing something really right!”

Arm in the freezer, I was humbled, caught off guard. Then I felt a tug to seize the moment to advertise “thank you so much, I actually have a book I wrote full of nutritious recipes right over there on the counter,” but instead, I paused, let the compliment sink in. And it FELT GOOD. I was doing something right. I was doing and have been doing something right for my kids and it shows. Not just to me, my husband, friends, and family. It is visible to everyone. All I could say with a proud, affirmed smile was, “Thank you”.

Yesterday was a good day.

There were quite a few times during the beginning of our journey of healing autism that comments made from others had left me in tears not smiles as they pointed out my son’s differences, difficulties, or my failed attempts at parenting. Those kind people, especially the lovely woman taking the time to say something nice, just because she noticed... a moment I will remember. Remember and feel affirmed that I am doing something right even though there are still often many things that leave me feeling otherwise.

Today doesn’t change yesterday and tomorrow can be better! And that there is the truth.

I know that is the truth. As we continue to fuel our son(s) with nutritious, organic foods, and reduce their exposure to environmental toxins and food allergens/sensitivities, their health improves. Symptoms of autism are reduced. It has been 8 years of adherence to the Air Diet and over that time we have experienced unforeseen progress in social, mental, emotional, and physical development within our son. As our son’s diet has improved by eliminating gluten, casein, soy, dyes, and other food allergens and replacing all that was disrupting his body and mind with allergen-free, organic foods, and supplements, his gut is slowly healing from pathogens, the inflammatory responses to foods are reduced, and toxins are being cleared from his body. He is healing.

There is no cure for autism. I am aware! There is no magic pill. However, providing your children (and yourself!) with healthy foods and reducing environmental toxins…it makes a world of difference. It’s the difference between your autistic child being in “their” world or “yours”. Using food for healing creates a foundation for social, emotional, mental, and physical growth. Maybe it doesn’t present itself on every standardized test, but it shows up in ways that count.

Start your healing journey. Start the Air Diet.


"Fast" food without the "mommy-guilt"

So day three after Thanksgiving…the Christmas tree is up and my kiddos will be expecting Christmas every morning now! So glad that our little shelf-elf has paid us an early visit to help my boys keep the holiday behavior frenzy in check! (Thank you Chippy!)

I am trying to transition quickly from one holiday to the next, but finding it a challenge as my refrigerator is still overflowing with Thanksgiving left-overs and my beautiful fall flower arrangements are still flourishing in their vases. I am distracted with excited thoughts of the holidays but also a bit flattened by the extensive cooking and baking that has gone on in the last week; however, I still have 3 little boys who are ALWAYS hungry!  “LUNCH!!!”

With all the hustle of the holidays, it seems eating “easy to grab food” becomes the need and acceptable norm. Although grab-n-go food does allow for more time to SHOP and WRAP and DECORATE and PLAN, it tends to leave you without the lasting energy and nutrients to really fuel you for a happy holiday season, and can leave your kiddos an irritable, whiny, hyper mess more prone to illness…and we all know how that can bust a holiday.

Because my oldest, autistic son has had anywhere up to 35 IgG food allergies for the last 8 years, drive-thrus and frozen meals have not been an option for us. Some of that is changing though as more and more gluten-free, allergy-free foods are becoming available in stores and restaurants in combination with his incredible reduction in his number of food sensitivities. However, my experience in restaurants has been one that often leaves my kiddos with dark circles under their eyes, stomach pains, digestive upset, irritability, and headaches ... enough to still make me shy away from the “easy way” out of the kitchen.

So, what to do when you can’t go through the drive-thru but still need food fast? You make that fast food in your kitchen.

Today in my kitchen, that’s exactly what I did.

Upon hearing the boys’ shouts of what could only be explained as shear starvation, my first impulse was to look in the refrigerator for a frozen pizza for their lunch. (I need a break…What??? I still haven’t cleaned the breakfast dishes from the pumpkin pancakes, and there is laundry, decorating, and Christmas cards!) Then, I felt that tug…yes the tug of guilt, or perhaps it’s smarts…but I chose not to open that freezer. Instead, I quickly prepared a nutrient dense dish that in all honesty took less time than it would have ever taken to cook that pizza! 

Quinoa Pasta with Broccoli Curry Coconut Cream Sauce


What’s so special about this dish? Well for starters…It tastes DeeeLISH! It has the same creamy comfort of homemade macaroni-n-cheese but without the dreaded casein (dairy protein) and well, it has so much more flavor!

Other pluses -

  • It only took 12 minutes
  • No measuring
  • A one pot meal
  • NON GMO
  • Organic
  • Gluten-Free, Casein-Free, Soy-Free
  • Antiinflammatory benefits
  • Antifungal benefits
  • Rich in vitamins , minerals, healthy fats, and fiber

The bonus benefit…no mommy guilt. 


OK, so you may not be a pro in the kitchen, but seriously you can just throw this all together with confidence…even if all you know how to do is boil water!

So, start with a pot full of water and bring it to a boil. Then add your quinoa pasta (you could also use lentil pasta and feel just as good about the nutrients). After 5 minutes, throw in some organic (fresh or frozen) broccoli florets. Lower temperature just enough so it all doesn’t ooze over the top of the pot. Keep cooking for another 6-7 minutes or until veggies are done to your liking. Drain and then put pasta back into the pot. Add one can of organic coconut milk. Stir on med-low heat. Add in yellow curry powder, garlic powder, and sea salt to taste. EAT!

Hope your  Holiday Season kicks off with a healthy start!

If you are in need of more quick allergy-free  food options for you and your kiddos, check out this chapter in the Air Diet!


From Farm to Table...not such a far distance!

So since you are reading this, I know you have some interest in eating “healthy” or being “healthier”. Seems however to be a challenging thing to be, as what is considered “healthy” seems to change like the seasons. Truth is though…the most nutritional foods have not changed: if it came from the earth and not a factory or through a window, well, it is probably pretty “healthy”. This simple health equation can take on a twist though when food allergies, IgG food sensitivities, leaky gut, and other genetic or autoimmune factors are present. As for my family…we are TWISTED!

When we began our “life on air” 7 ½ years ago, we were focused on eating gluten free and casein free. Very quickly we modified it even more by eliminating the allergens from severe food sensitivities (IgG food allergies…and there were many, 35 foods!!). Then came the cleaner side of things…going organic; but that is no longer enough!! Now there is the added dimension on top of all that of avoiding GMOs.  Oh, and don’t forget to eat “in season”. And the most current health trend:  Farm to Table!

In my free time (haha, what’s that?), I really enjoy being outdoors, working hard, feeling the warmth of the sun, and breaking a sweat…pair that with my love of fresh food (snobbery), and creating my own garden seems to be a fantastic idea!

In my “pre-mommy” days…before I was terrified of (aware of) the negative health implications of fertilizers and pesticides…I had an amazing garden! Tons of tomatoes and so many varieties of hot peppers that almost everything we ate was “kicked up” a notch. I had zucchini the size of my cat and gorgeous bell peppers. Now, with all my wonderful knowledge of organic living, to my surprise, my garden, well… it has not been so plentiful (I have an ever increasing appreciation for organic farmers!). That being said, I do have hope this fall all that will change!

This is my first fall garden!


Everything looks so fresh, “alive”, and radiating promise of a great harvest! SO… what fresh vegetables are growing here?

Cauliflower, Collards, Kale, Romaine Lettuce, Salad mixer (varieties of lettuce), Basil, Mint, Oregano, Thyme, Cilantro, and Sage.


I love my garden! Something is just so right and peaceful about it; just being around it emanates a feeling of calm and connectedness throughout me.  On top of all those feel good feelings… it is a great activity for our family. The kids got really excited to select what we would grow this fall. (Yes, my kids get excited about cauliflower! Live on the “Air Diet” and yours will too!) And my super awesome husband rigged it with an irrigation system sure to keep things growing… seriously that was not on his “honey-do list”.

Now it’s time to wait for our first harvest and get some recipes together that will showcase our yummy project!

What am I drooling about? Cauliflower Kale Soup, Collard Wraps, Garlic Collard Greens, Super Stew, Kale Smoothies, and Fresh Juice. Oh, and salad….amazing salads! (Seriously, I am smiling with anticipation and excitement!) If it sounds good to you, keep checking in to see what recipes I share!

So easy and so simple to eat “healthy” as well as gluten free, casein free, organic, NON GMO, and in season, when the farm is in your back yard! Check off all those boxes…and check out how revived you and your family will feel as you fuel it with all that it needs for healing and healthy living.

So here is my first Pre-Harvest, Gluten Free, Casein Free, Organic, NON GMO, in Season, Farm to Table Recipe Give Away…. Enjoy!


Cauliflower Kale Soup

I love this soup on a cool fall night, and to my surprise my children do also! I am excited to try it when made with cauliflower and kale from our own garden!

For achieving the best flavor, please use “organic virgin coconut oil” as it helps to create depth and tasteful complexity to this delicious soup. Also…a little tested tip:  Remember to allow the soup to cool before placing it in the blender. The steam will cause the soup to explode out of the top of the blender if you try to mix it while it is too hot. (I had to learn the hard way!)


Cauliflower Kale Soup

What You Need:
2 heads cauliflower, washed and chopped
3 tablespoons organic virgin
coconut oil, melted
sea salt, to taste
black pepper, to taste
¼ teaspoon garlic powder
2 tablespoons coconut oil
1 large onion, diced (sweet, yellow, or red)
1½ cups chopped, peeled carrot
4 sprigs of fresh rosemary, removed from stem and chopped
8 cups organic chicken broth
2-3 handfuls of kale leaves
½ teaspoon freshly diced cayenne pepper

What To Do:

  1. Preheat the oven to 400°.
  2. Place the cauliflower pieces in a large bowl. Pour the coconut oil over the cauliflower and toss until evenly coated.
  3. Arrange the cauliflower on a glass baking dish and sprinkle with sea salt, black pepper and garlic. Bake for 40 minutes, turning halfway through the cooking time. The cauliflower should be tender-crisp with lightly browned edges. (If using a metal pan, decrease oven temperature and bake time)
  4. In a large pot, melt 2 tablespoons of organic virgin coconut oil. Add the diced onion, chopped carrot, and rosemary. Sauté for about 8-10 minutes over medium-high heat. Season with salt and pepper to taste.
  5. Add 7 cups of organic chicken broth to the pot and bring to a rolling boil for 5 minutes. Reduce temperature to low. Add kale leaves and freshly diced cayenne pepper. Cover and continue to heat for 5-8 minutes.
  6. Add most of the roasted cauliflower to the broth mixture (reserve about 1/3 of the cauliflower). Turn off the heat and allow the soup to cool slightly.
  7. Using a ladle, scoop out portions of the soup and place it into a blender. Blend the cauliflower-kale-broth mixture until well combined. Continue this process until the entire pot of soup is a smooth texture. It will appear light green with green specs.
  8. Add the remaining cauliflower to the pot of soup. Add salt and pepper to taste, if needed. You may even enjoy a few more fresh kale leaves tossed into the mix. The kale will soften as the soup continues to heat.
  9. Continue to warm the soup on a semi-low heat, and serve alone or with a mixed greens salad and toasted bread.